
Medford Wood Flooring offers hardwood floor staining as part of sanding and refinishing work across Medford, MA, serving surrounding cities including Somerville, Malden, Winchester, Arlington and Everett. Color is the choice people worry about most, because it is the one they will live with every day and the hardest to change once it is on the floor.
That is why we never ask anyone to choose a stain from a brochure, a website or a sample board. We sand the floor first, lay stain samples directly on your own wood, and let you look at them in your own light, at different times of day if you want, before a single room is stained.
Over more than 20 years we have seen how much the same stain can change from one floor to the next. Red oak, white oak, maple and pine each take color differently, and a room facing north shows a floor very differently from one facing south.
Choosing a Stain Color
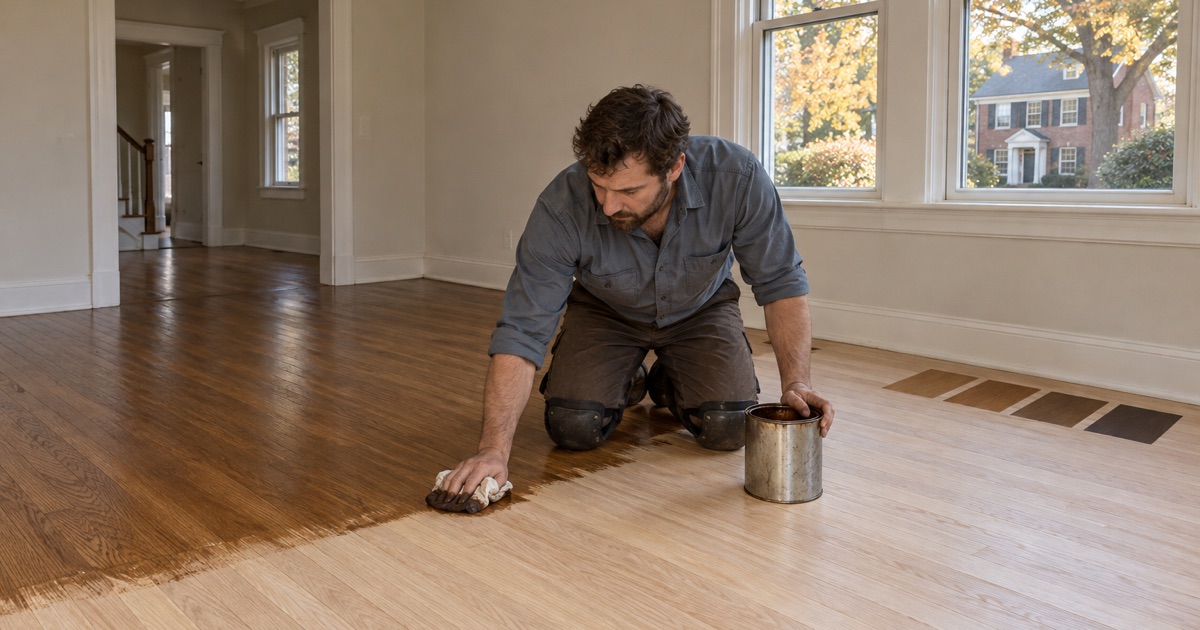
Samples on Your Own Floor
After sanding, we apply several stain samples side by side in a spot you can see from the main part of the room. If rooms get very different light, we put samples in more than one place.
You choose from what you see there. It takes a little time, but it is the most reliable way to avoid a color that looked right on a screen and wrong on the floor.
How the Species Changes the Color
Red oak has a pinkish undertone that warms any brown stain, while white oak leans toward gray and olive and takes cool and neutral colors cleanly. The same can of stain will look noticeably different on the two.
Maple and birch are dense and tend to take stain unevenly, and eastern white pine absorbs stain in patches unless it is prepared first. We factor the species into which samples we show you, so you are not choosing between colors the wood cannot achieve.
Natural, Neutral and Dark Directions
A natural finish with no stain keeps oak light and shows the grain clearly. Neutral and grayish browns suit modern interiors and hide everyday dust well, and they are often the easiest colors to live with.
Dark stains look dramatic, but they show dust, pet hair and scratches more than any other choice. We are happy to go dark, and we will show you a dark sample beside a mid-tone one so you can see the difference before committing.
Matching an Existing Floor or Stair
When only part of a house is being refinished, the new color often has to sit beside a floor or stair that is staying as it is. We lay samples right at the meeting point so you can judge the match where it will actually be seen.
An older floor under an ambered oil finish may need a stain plus an oil-modified topcoat to match, rather than a stain alone. Where a perfect match is not possible, a threshold or a change of direction at a doorway can make the difference look intentional.
Getting Even Color
Sanding and the Grit Sequence
Stain magnifies every flaw in the sanding. Swirl marks, chatter from the drum sander and scratches left by skipped grits all soak up more pigment and show as darker lines or patches.
We work through a full grit sequence and finish with an orbital sander so the surface is even across the whole room, including the edges where the edger has been. That preparation matters more to the final color than the stain itself.
Water Popping for Deeper, Even Color
Water popping means lightly wetting the sanded floor so the wood grain opens and stands up slightly before stain is applied. The opened grain absorbs stain more evenly and more deeply, which gives a richer color and reduces blotching.
We use it for dark colors and on species that tend to stain unevenly. The floor has to dry completely before staining, which adds time but produces a far more even result.
Blotch-Prone Species and Conditioners
Maple, birch and pine are the most likely to blotch, because their density varies from one part of a board to the next. A wood conditioner or a washcoat before staining helps the color go on more evenly.
Even so, a deep, uniform color is hard to achieve on these species. When a customer wants a dark maple floor, we test first and talk honestly about what the wood will and will not do.
Stain and Finish Together
Letting Stain Dry Before Finishing
Stain has to be completely dry before the first coat of finish goes on. If it is not, the finish may not bond, the color can smear, or the coating can stay soft.
Drying time depends on the stain, the temperature and the humidity. We check it rather than guessing, which occasionally means waiting an extra day for the first coat of finish.
Choosing the Finish Over the Stain
Waterborne polyurethane keeps a stained color true, while oil-modified polyurethane adds a warm amber cast that shifts cool stains toward brown. Hardwax oils can be combined with color in a single product for a matte, natural look.
Every clear finish we apply is chosen to meet the Massachusetts VOC limits for wood coatings under 310 CMR 7.25, which are stricter than the federal ones, so the finish that protects your stained floor is also legal to apply here.
Fixing a Stain That Went Wrong
Blotchy color, a stain that dried too dark, or a color that does not match the sample usually means the floor has to be sanded back to bare wood and stained again. Stain cannot be lightened reliably once it is in the wood.
We identify why the first attempt failed, whether it was the sanding, the species or the product, and correct that before restaining, so the second attempt does not repeat the problem.
- 20+ Years in Wood Flooring
- Stairs Priced by the Tread
- Moisture Readings Before Repairs