
Medford Wood Flooring brings more than 20 years of wood floor refinishing to homes in Medford, MA, serving surrounding cities including Somerville, Malden, Winchester, Arlington and Everett. We sand worn hardwood back to clean wood, repair whatever the sanding reveals and put down a new finish suited to how the room is used. Most of the floors we refinish are decades old, and that age is exactly why they are worth keeping.
A refinish is not the same job on every floor. Some floors need only a careful cut and fresh coats, while others are hiding wax, shellac, painted borders or boards that earlier crews sanded thin. We measure, test and look before we put a price on anything, so the quote describes your floor rather than an average one.
Refinishing is also usually the least expensive way to end up with a floor that looks new. Published Massachusetts prices for sanding and refinishing generally run about $3 to $9 per square foot, well below the cost of tearing out and replacing solid hardwood, and keeping the original boards spares the house the disruption of a tear-out.
What Wood Floor Refinishing Can Fix
Finish Worn Through in Traffic Lanes
Once the finish wears through in a hallway or in front of the sink, bare wood starts to absorb dirt and water and turns gray. That is the point where a screen and recoat stops helping, because a new top coat cannot bond evenly over bare wood and sealed wood lying side by side.
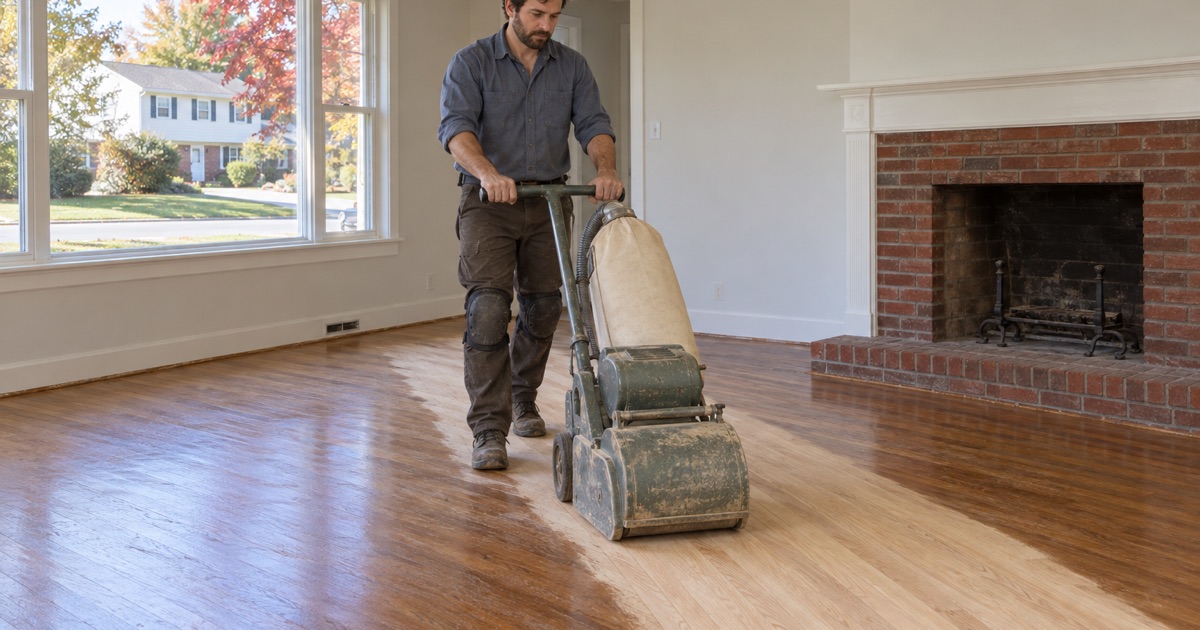
A full refinish sands the whole room to one level, so the worn lanes and the protected corners come back to the same color. Catching a floor at this stage, before the gray soaks deep into the fibers, usually means the discoloration sands out completely.
Scratches, Water Stains and Pet Damage
Surface scratches and light water stains sit in the finish or the very top of the wood, and sanding removes them. Dark water stains and black pet urine stains are a different matter, because they reach deep into the board and sometimes into the subfloor underneath.
We tell you before sanding which marks will come out and which boards need a weave-in repair instead. Replacing a few stained boards with matching wood before the final sanding means the repair is sanded and finished with the rest of the room, so it blends in.
When the Wood Is Too Thin to Sand Again
Every full sanding removes wood, and a floor that has been refinished several times may be close to the tongue. Sanding into the tongue exposes the nails and leaves the board edges weak and splintery.
We check the remaining thickness at a floor register, a threshold or a lifted board before quoting. When there is not enough left, we say so and talk through a screen and recoat, partial board replacement or a new floor, rather than sanding a floor that cannot take another pass.
Floors We Refinish Most Around Medford
Red Oak Strip in Postwar Capes and Garrisons
The postwar Cape Cods and Garrisons of Fulton Heights and Highland Park commonly have narrow red oak strip floors, and those floors respond well to refinishing. Red oak sands evenly, takes stain predictably and hides small wear once it is finished.
We still measure first, because a floor that was sanded hard by an earlier crew may have less left than it looks. With the thickness confirmed, most of these floors come back with a standard grit sequence, a careful edge and a sealer plus top coats.
Older Floors Under Shellac and Wax
Floors in houses built before the Second World War were often finished with shellac and kept up with paste wax for decades. Both have to come off completely, since polyurethane will not bond over wax and does not always bond well over shellac residue.
A drum sander gums up quickly on wax, so we start these floors at a coarser grit and change paper more often. The payoff is oak or pine with a new finish that stays put, rather than one that lifts a month after the job is done.
Floors With Radiator and Pipe Patches
Where old radiators and steam pipes came out, many older floors carry holes or bare rectangles that were filled with putty or hidden under a rug. Sanding makes those patches more visible, not less.
We cut them out and weave in matching boards before the final sanding, taking replacement wood from a closet floor or buying matched stock when the species allows. Once finished, the patch reads as part of the floor instead of a square of filler.
Our Step-by-Step Wood Floor Refinishing Process
Step 1: Inspect, Measure and Test
We check how much wood is left above the tongue, look for painted borders or painted stairs, test the surface for wax and ask when the house was built. In a home built before 1978, painted surfaces fall under the Massachusetts lead-safe renovation rules, so containment is planned before a sander is switched on. This visit is also when we note loose boards, stains and old patches that belong in the quote.
Step 2: Repairs and Preparation
Loose boards are refastened, damaged boards are woven out, and nail heads are set below the surface so the drum sander cannot catch them. We remove quarter round where it needs to come off, cover heating vents and returns, and seal doorways so dust stays in the rooms being worked. Furniture has to be out of those rooms before this step starts.
Step 3: Sanding With Dust Control
The open floor is sanded with a drum sander through a grit sequence from coarse to fine, and the edges and corners with an edger. A final pass with an orbital sander removes the swirl and chatter marks that would show under stain or a clear finish. A HEPA vacuum then collects the dust from the floor, the sills and the gaps between boards before anything is applied.
Step 4: Stain Samples and Color
If you want a color, we lay stain samples on the sanded floor and you choose in your own light, looking at them at different times of day if you like. On maple, on pine, or when a dark color is chosen, we may use water popping to open the grain so the stain takes evenly. Natural floors skip straight to the sealer.
Step 5: Finish Coats and Cure Time
We apply a sealer and then the top coats, lightly abrading between coats so each one bonds to the last. Waterborne finishes allow light foot traffic sooner than oil-modified ones, and we tell you when furniture and rugs can go back for the product you chose. Full hardness comes over the following weeks, so the first stretch calls for felt pads and a little care.
Choosing a Finish and Sheen
Waterborne Versus Oil-Modified Polyurethane
Waterborne polyurethane dries clear, keeps white oak and maple light, and gives off far less odor while it cures. Oil-modified polyurethane adds the amber tone many people like on red oak, but it dries slower and smells stronger for longer.
Whichever you choose, the product has to meet the Massachusetts VOC limit for clear wood finishes under 310 CMR 7.25, which is stricter than the federal rule. We work from finishes that meet it, so you never have to trade the look you want for a coating that is legal to apply here.
Hardwax Oil for a Matte, Repairable Floor
Hardwax oil soaks into the wood instead of forming a film on top, which gives a low-luster, natural look. A scratch or worn spot can be spot-repaired with more oil rather than sanding the whole room.
The tradeoff is more regular care, since the oil has to be refreshed as it wears. It suits households that want a matte floor and do not mind looking after it, and it suits a rental that has to be left alone between leases far less well.
Sheen Level and How Much It Shows
Sheen level runs from matte through satin and semi-gloss to gloss. The higher the sheen, the more it shows scratches, dust and every small flaw in the sanding.
Satin and matte hide daily wear best and tend to look right in older houses. Gloss is a choice we are glad to make, but we explain what it will show before you commit to it on a whole floor.
- 20+ Years in Wood Flooring
- Stairs Priced by the Tread
- Moisture Readings Before Repairs